
Working With Iron and a Cautionary Tale
Several years ago, I went through a Type 40 Bugatti engine that had had a hard life. Its recent days hadn’t been made any easier by the chap that took it apart, using a dead blow hammer to break free the joint between the cylinder block and the crankcase.
Not a crazy idea, to use a soft hammer to shock the iron block to break the seal. Modern RTV silicone is miraculous in how oil-tight it can make a prewar engine, but the downside is that the force required to separate glued parts can do permanent damage if appropriate care is not applied.
In this case, it was not applied judiciously enough.
A blow from the hammer at the rear face of the block broke the thin casting. Most people would assume that a rectangular block of iron would be pretty stout, but the back face of this block was very thin. From the flat back face of the block, the distance to the water jacket was perhaps as thin as 2 mm, or 80 thousandths of an inch.
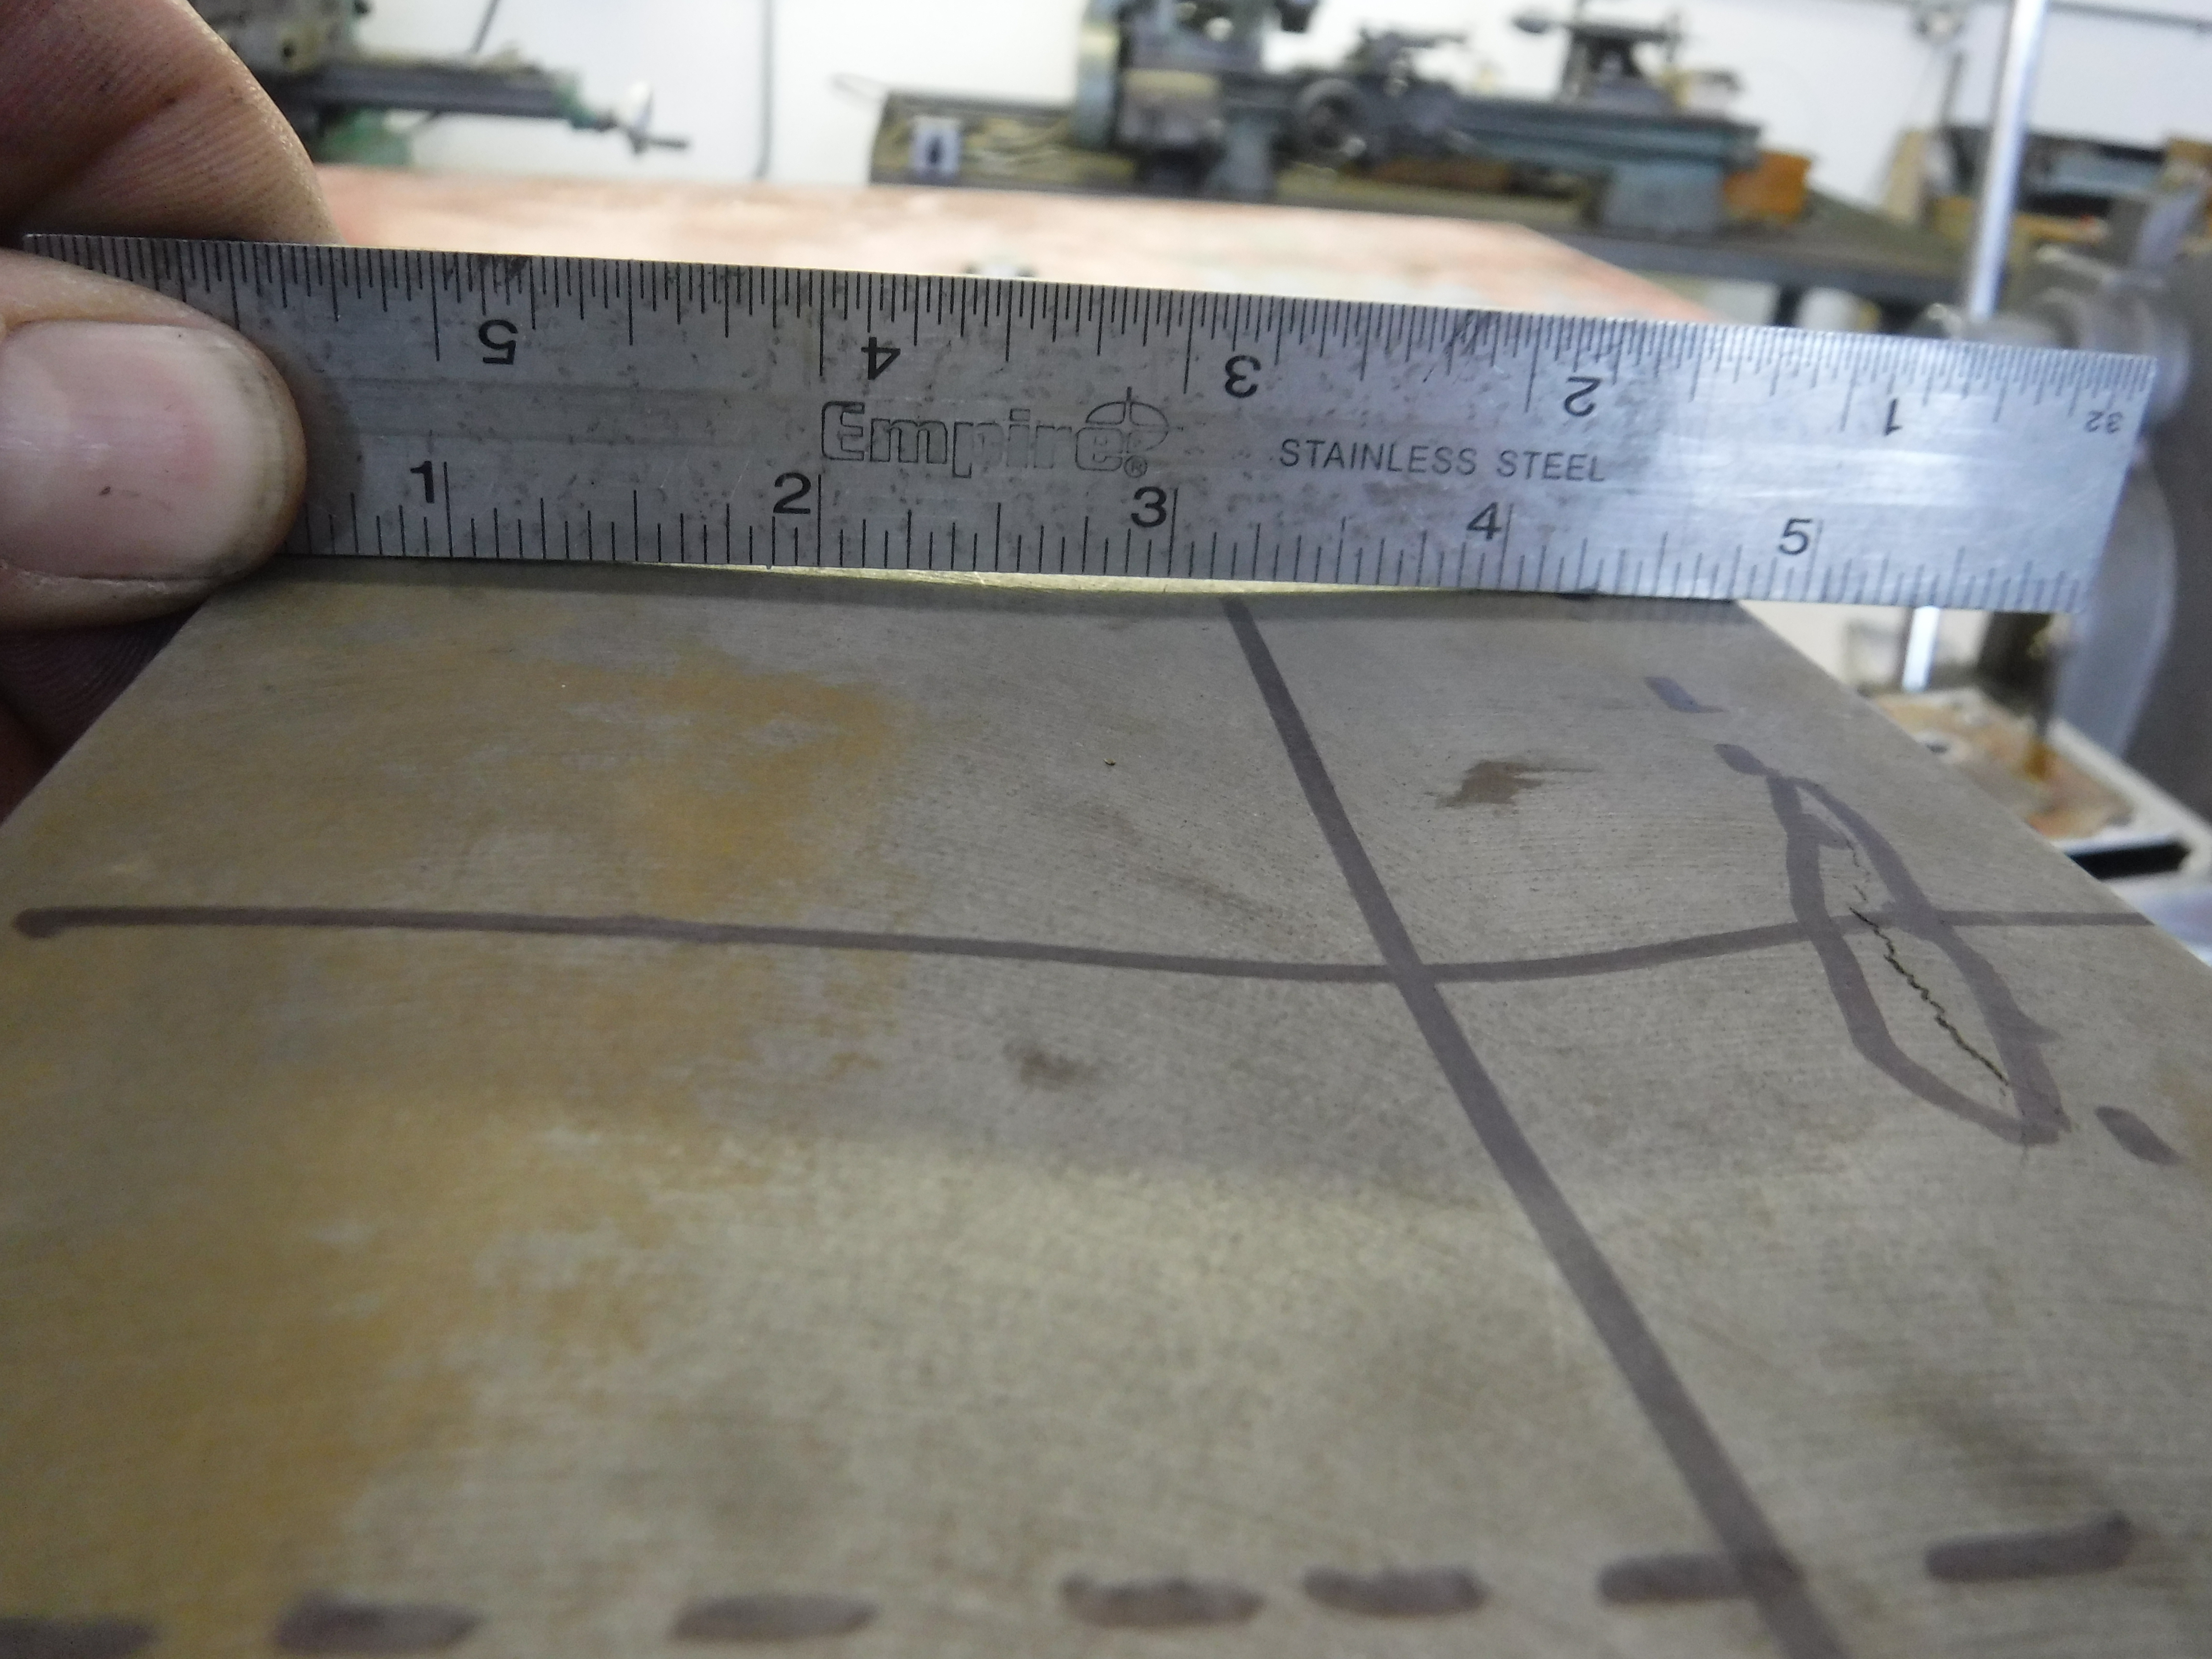
So the previously flat surface was caved in, and a crack appeared along one edge of the depression. This was both bad cosmetically, as the brutally square shape of the Bugatti engine is one of its signature design elements, and bad mechanically, as it now leaked water past the crack.
My thinking was that a new block would be the only way to produce an as-new result. But the team in the machine shop made a few repair attempts, the first of which inserted a machined flat piece of iron into a cutout window around the depressed area, with silver solder to seal the joint. This attempt failed as there were pinhole leaks in the brazed joint, as well as distortion in the thin iron plate from the heat of the torch. So it was not flat and an obvious repair. The hope was that there would just be a thin bronze line around the rectangular plate. A lower temperature solder may have reduced the effect.
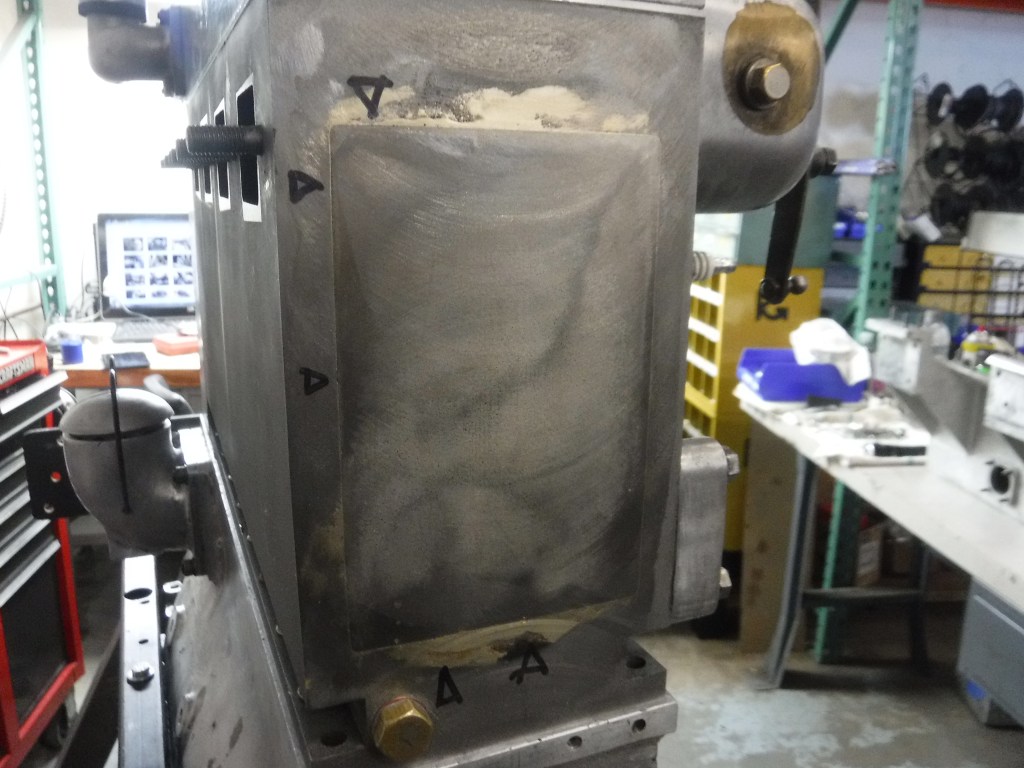
The second repair attempt was more dramatic, a lock-stitch repair that uses overlapping tapered iron screws to mechanically seal the joint, with red Loctite helping the seal. This also failed, again with pinholes leaking water. And the forces applied by the tapered screws bowed the repair plate outward, making it even less flat!
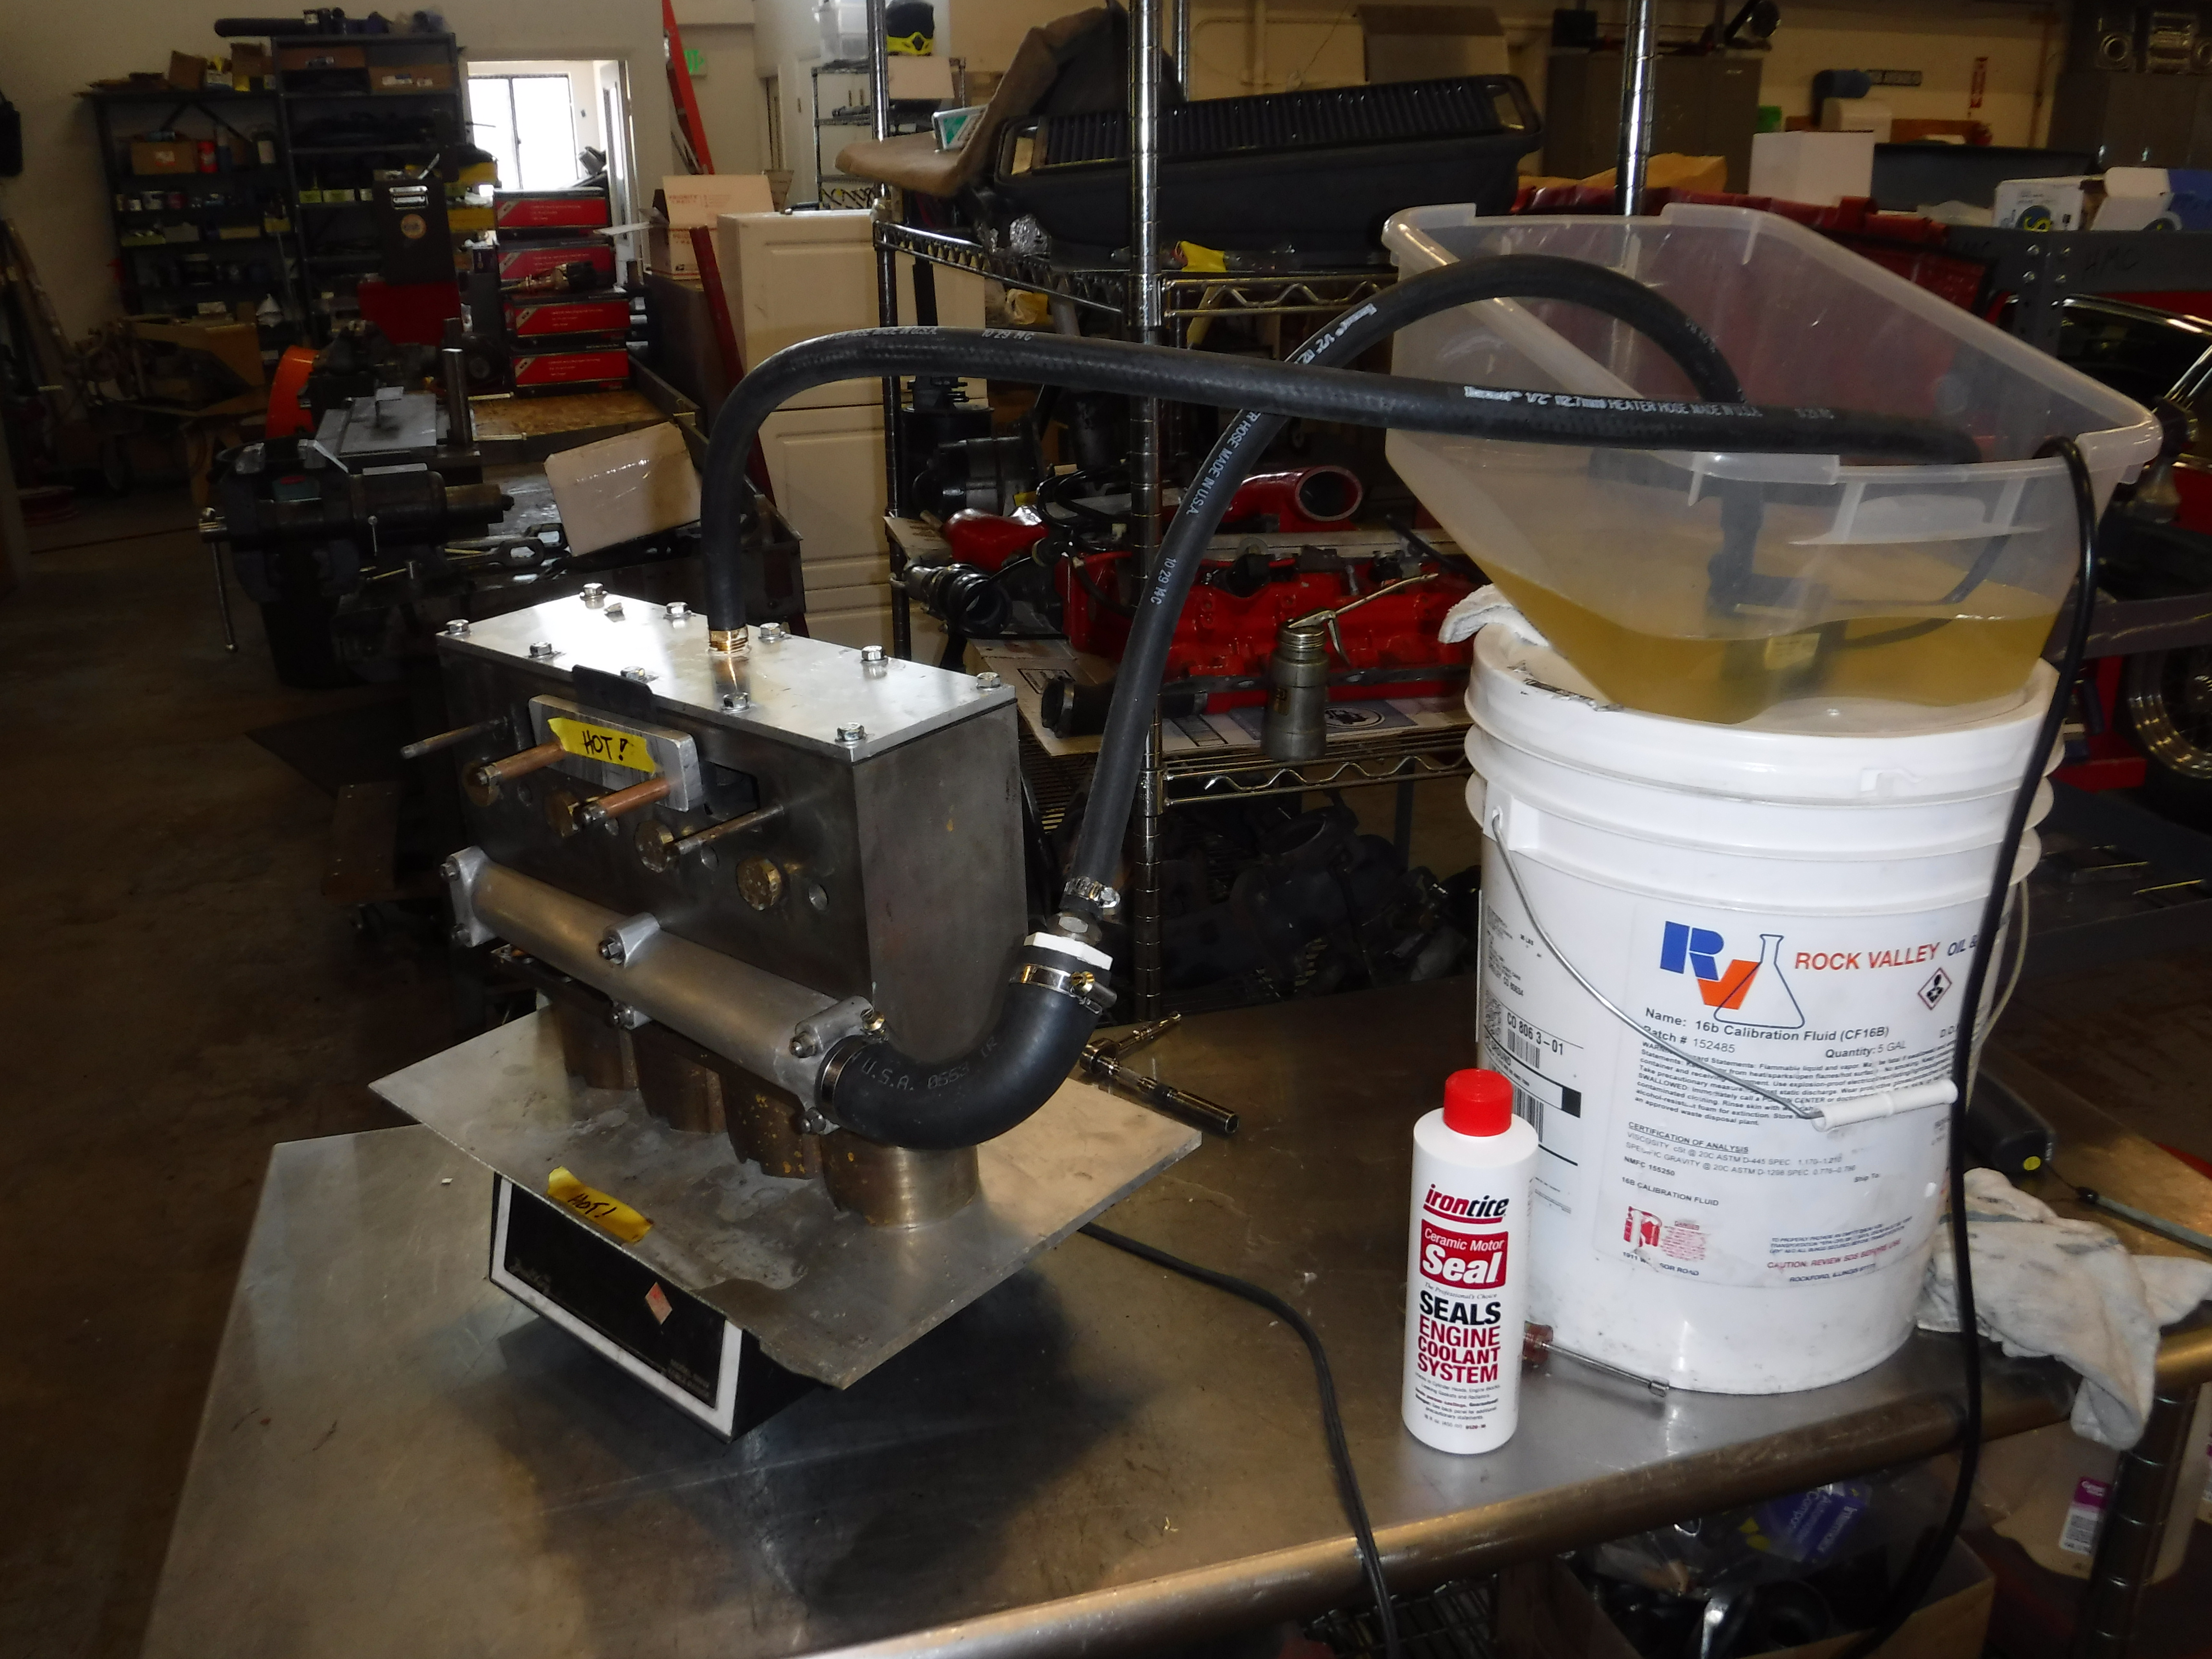
After this attempt failed a low-pressure test, a third option was attempted, a ceramic sealant product called Irontite, which I had seen used successfully in the past. This requires circulating a water solution with the sealing component under pressure and heat for 12 hours or more. I built a recirculating system that pumped the solution through the block, sitting on an electric hot plate, for most of a day. It did not work and the block still leaked at points around the repair.
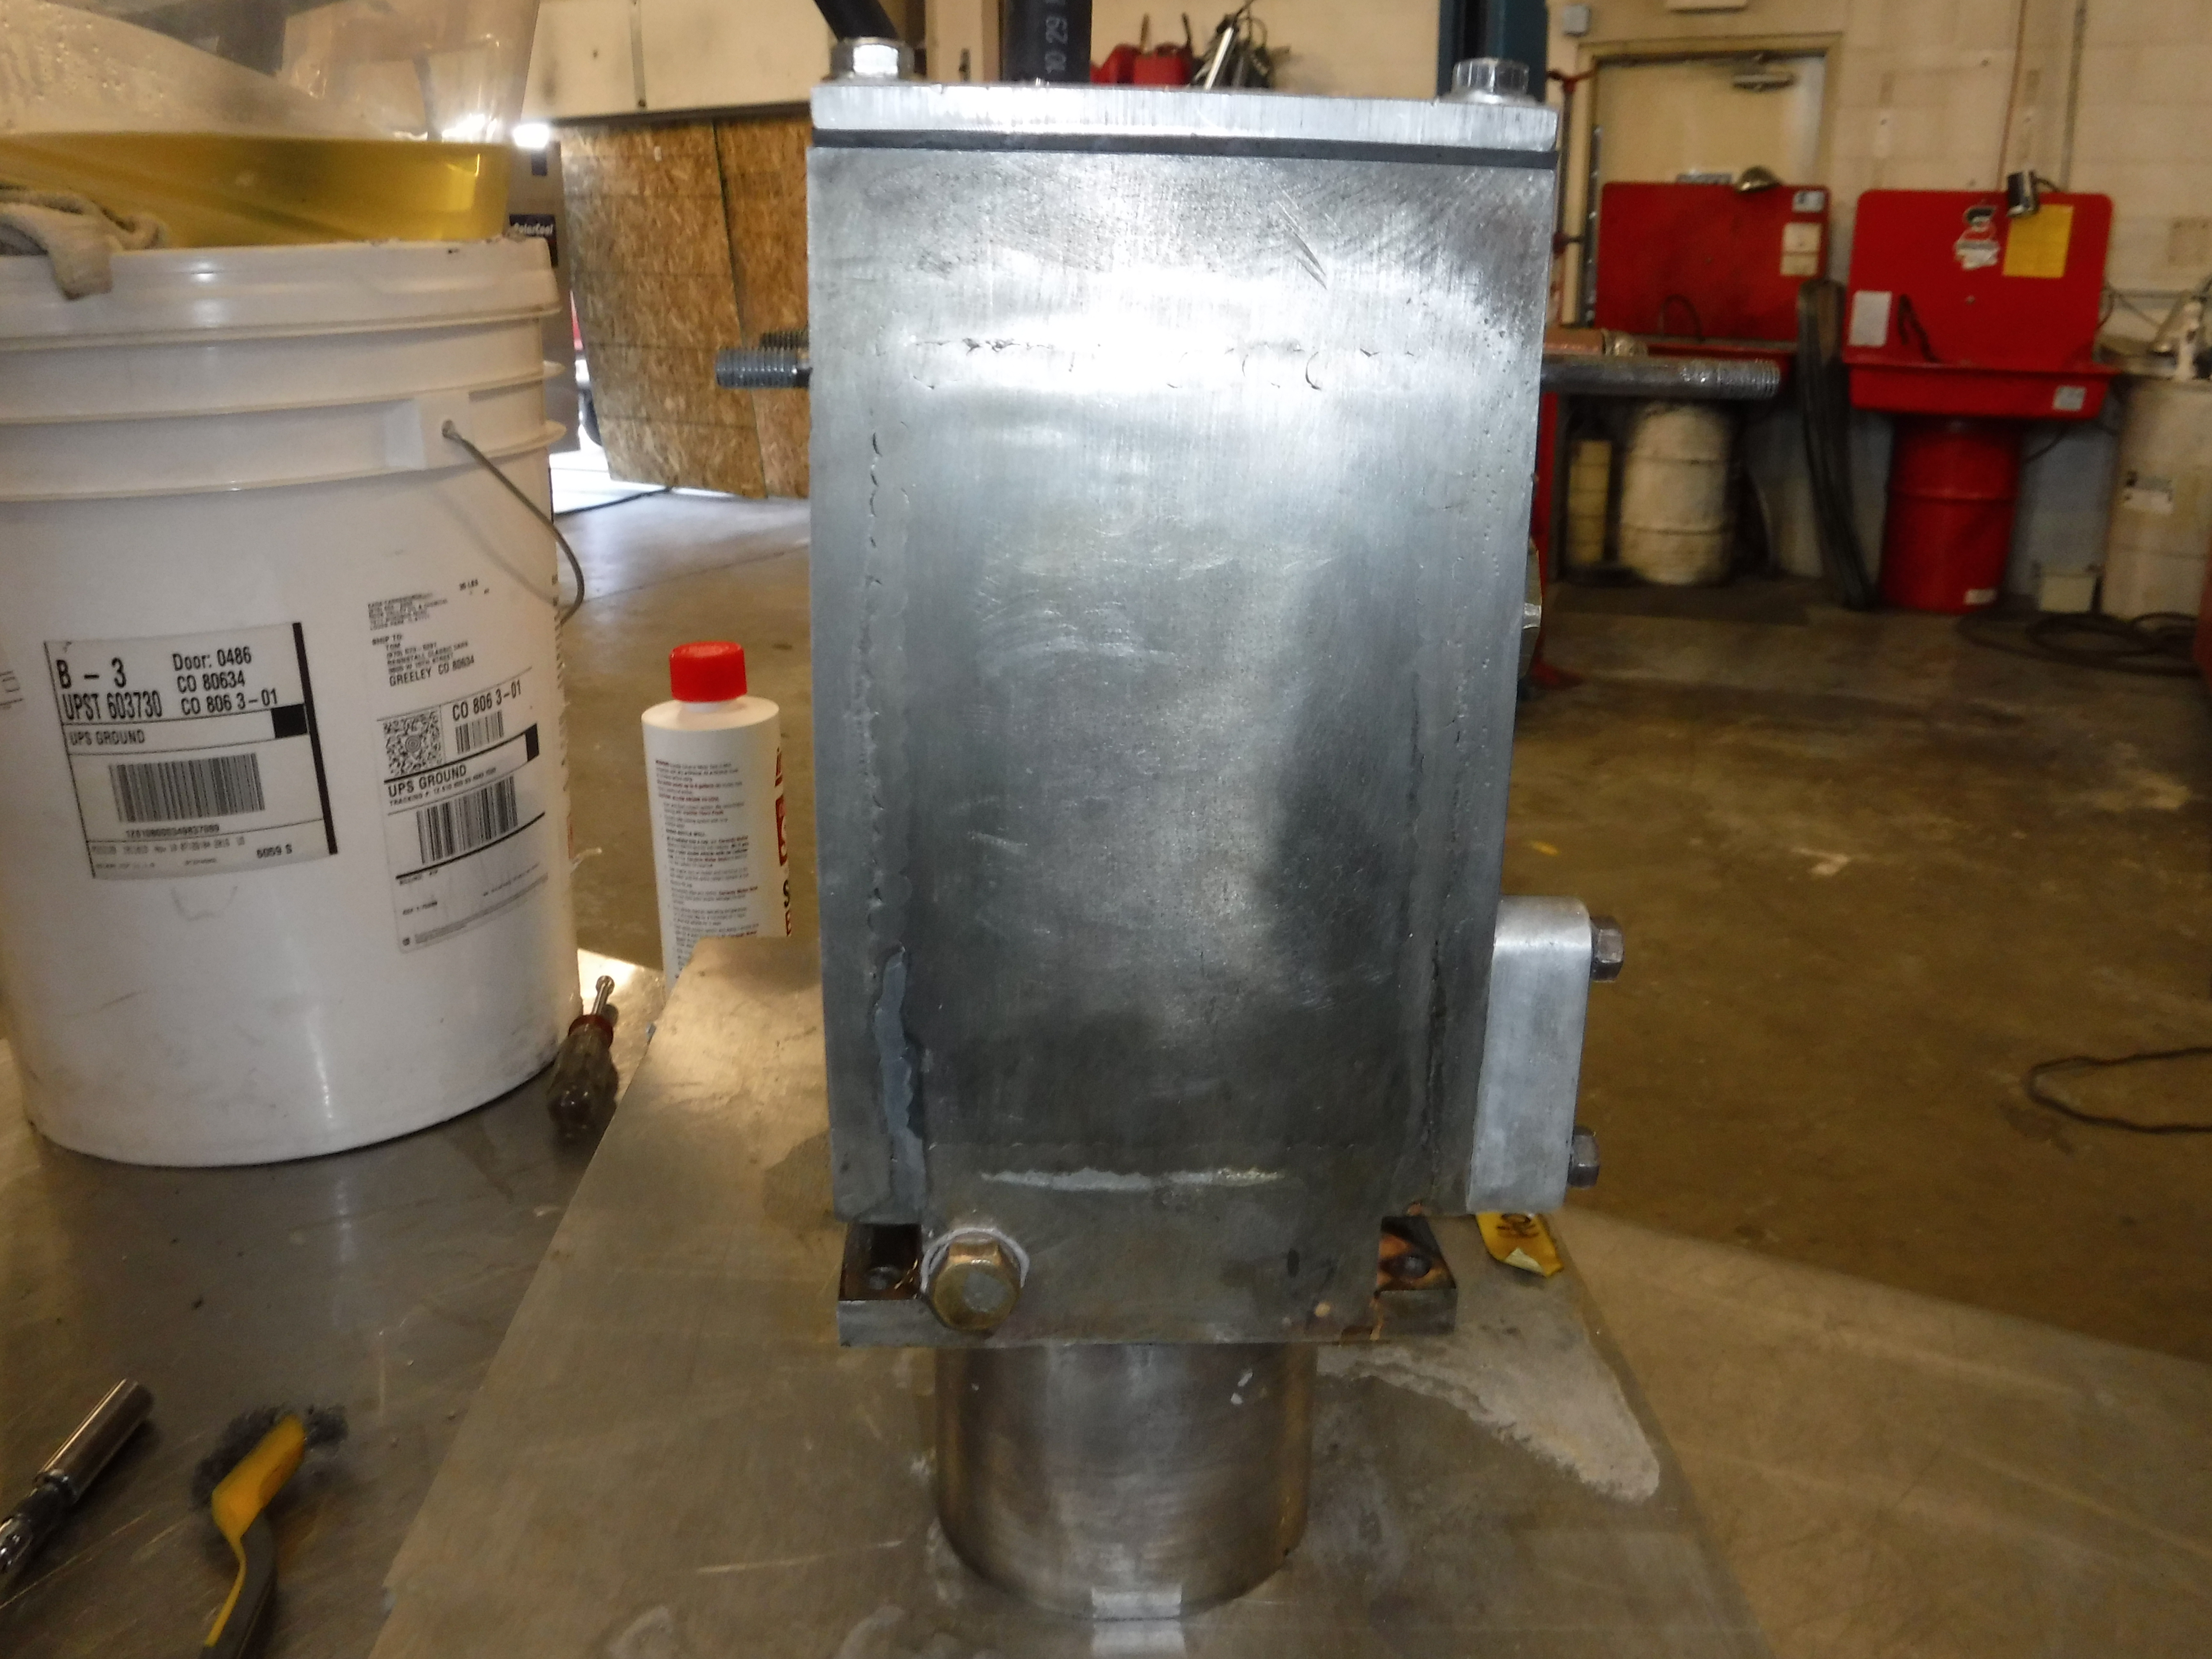
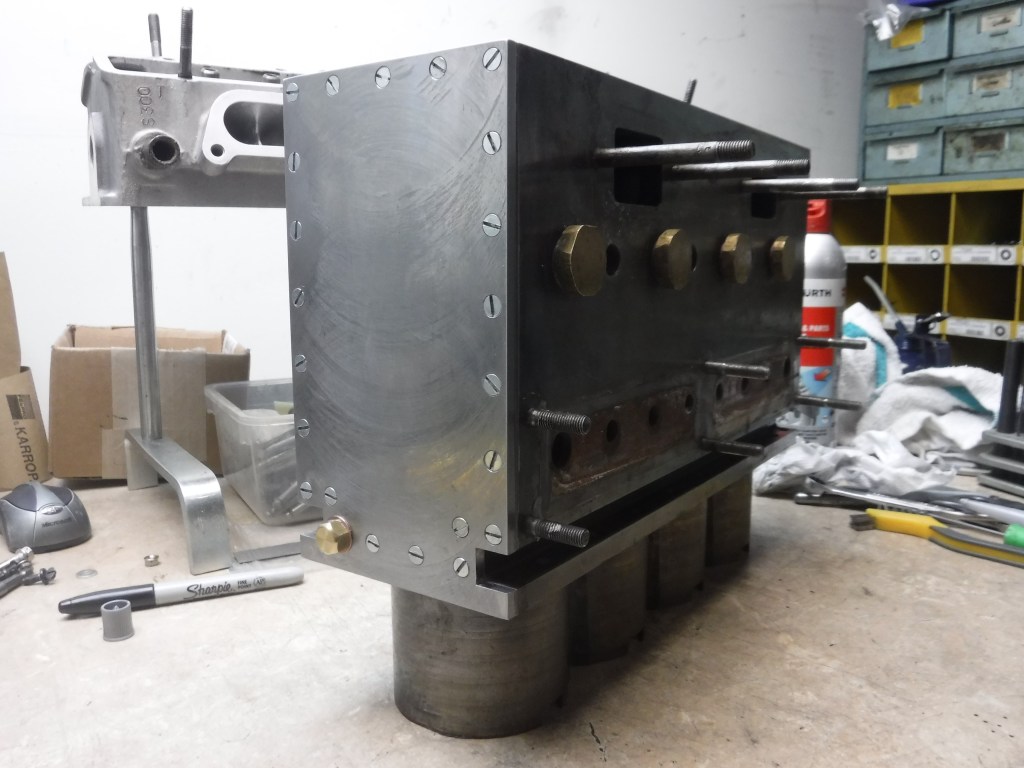
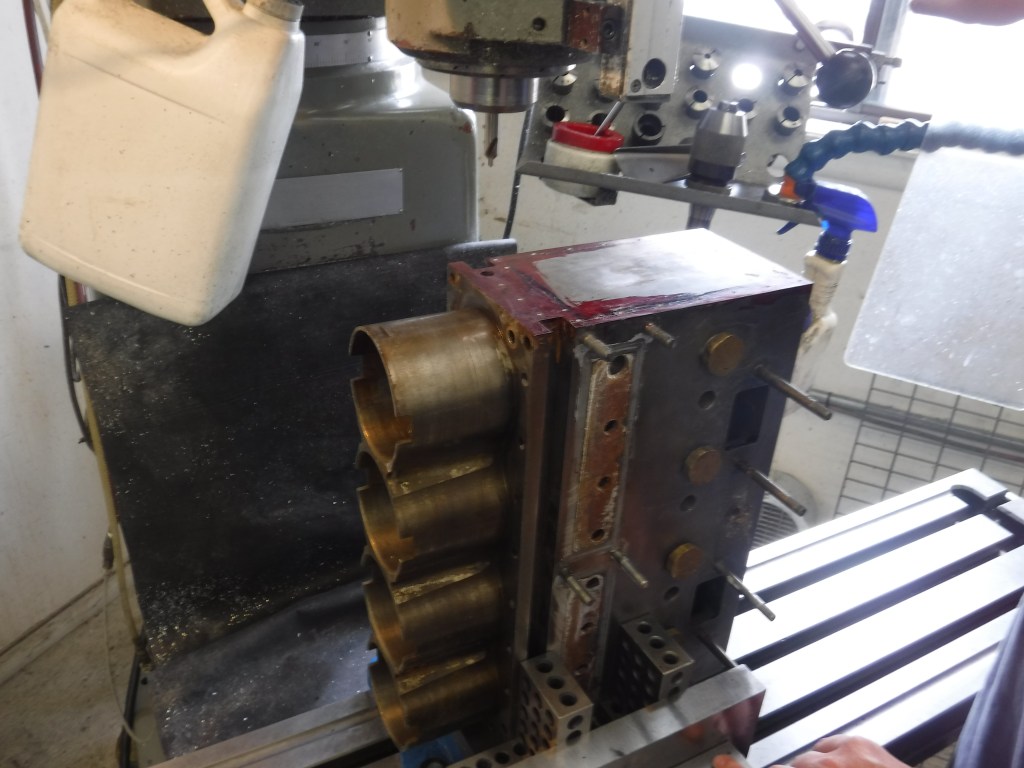
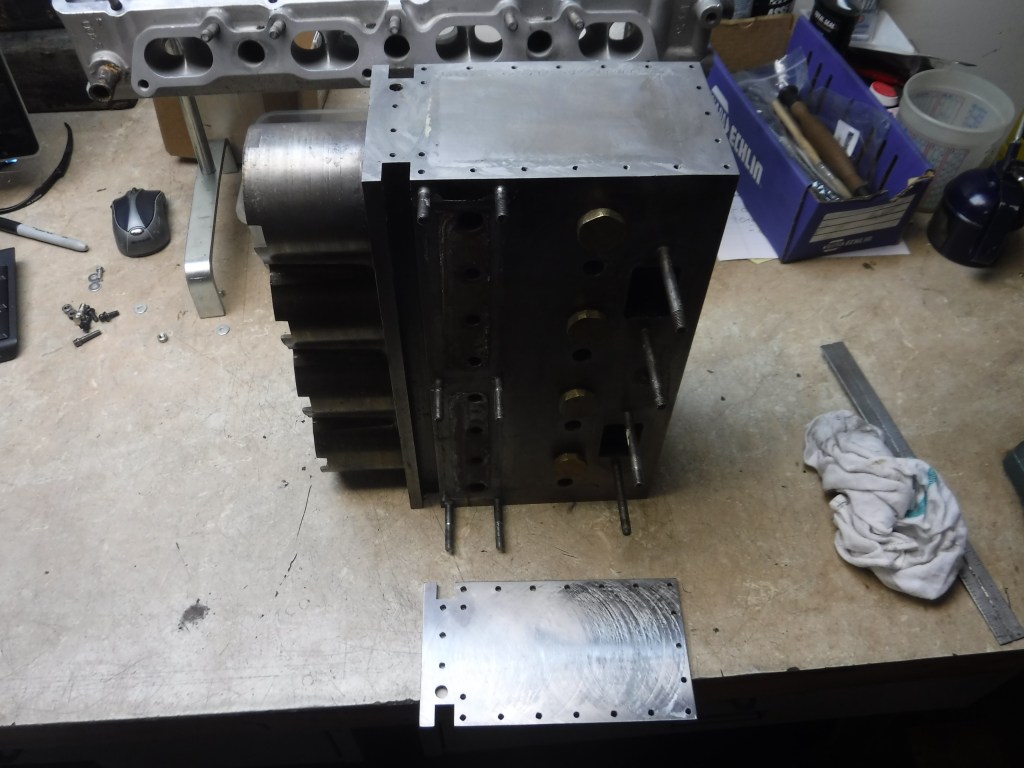
The final attempt was somehow the most simple and complex at the same time. An iron plate was machined to the same shape as the rear of the block, and holes were drilled and tapped to secure the plate with countersunk screws. A paper gasket and RTV ensured water-tightness. The downside is that this is a permanent change in the appearance of the engine, with no doubt that something unorthodox has occurred. But it worked. It certainly wasn’t the first Bugatti block to be repaired in this manner.
In the end, it very well may have been less expensive to buy a new block and have it bored to suit the pistons we were using, but that wasn’t my decision to make.
Considering all the other problems the engine had, the block repair was the least of our worries. But it does reinforce the importance of using great care in the disassembly phase of an engine project. I’ve witnessed some real humdingers of misapplied force over the years!

Leave a comment